 There are plenty of advice articles out there (much of it here on Gnome Stew) about how to learn a new system without having someone teach it to you. If you’re attempting a high level of system mastery from a book or box set, there are several things you can do.
- Skim the books, followed by a second pass of actually reading.
- Create some characters, preferably a variety of them to cover different rules and sub-systems.
- Have those characters fight each other. Roll all the dice yourself and push the rules.
- Get online and read forums and see what questions or issues others have encountered thus far.
- Create your own game master screen.
- Dive in and have fun with the game despite weird rulings or mistakes you may make.
- Adjust game play as you learn and grow with the system.
The area I’m going to focus on with this article is step #5 from the above list. I feel that creating your own GM screen can help improve your system mastery of a new RPG in a few different areas. Before I dive into these areas, I want to mention what you want to include on the GM screens.
While you’re walking through the rulebook, keep the following topics in mind as you seek targets for capture.
Learn the Rules
While skimming/reading through the book looking for items to capture for your custom GM screen, you’ll be immersing yourself into the rulebook.
Find the Nuances and Exceptions
Of course, there are plenty of nuanced systems, sub-systems, and exceptions to the core rules. These are, quite honestly, the most painful parts of GMing a game. It’s near impossible to memorize the exceptions with 100% accuracy, and the more nuanced the rulings, the harder it is to get them right. If you can fit a summary of the rules on your GM screen, you’ll never have to wonder how grapple works again. (Yeah, you all know what I’m talking about.) You’ll have those grapple rules handy at your fingertips for quick reference.
No Rote Memorization
If you run across a chart, table, or nice reference within the rulebooks that you just know you’ll never be able to pack into your headspace’s permanent memory, then you’ve found a wonderful item to pull into your custom GM screen.
Less Book Searching
Obviously, if you’ve dropped an item onto your GM screen, you’ll never have to search for it in the rule book. If you’re not able to jam the whole rule, or even a summary, onto your GM screen, I highly recommend reserving a sidebar area on the screen for a custom index of things you’ll want quick access to. This index can be keywords or phrases and page numbers associated with those items. This will help you find things quickly, especially if you’re playing a game system in which the books don’t have great reference materials baked in.
Nut and Bolts
Now that we have some ideas on what to put into the GM screen, let’s talk about the actual construction. I can’t recommend “The World’s Greatest Screen” by Hammerdog Games highly enough. There are a few options from their web site. I have about half a dozen of these for various games, and they’re wonderful, durable, reusable, and really easy to work with. If you’re strapped for cash, snag some cardstock or a cardboard box and some tape and build your own backing.
A piece of advice: If you go with a “sleeved screen” like the Hammerdog Games screen, tape all of your little squares and rectangles of paper to a standard 8.5 by 11 inch sheet of paper, and then photocopy that assembled sheet. Drop the clean photocopy into the sleeve. The reason for this, is that you don’t want tape down in the sleeves. In a hot car or with the bump and bustle of moving gaming gear around, the tape will “bleed” some of its adhesive around the edges of the plastic backing on the tape. This could lead to a sheet of paper being permanently attached inside the sleeve. I’ve had this happen once, but I managed to rescue the paper, tape, and sleeve. It was a near thing, though.
Once you have your layout (digital and physical) done, it’s a matter of choosing which pages go where. Most screens have four panels. In this case, you want the most commonly referenced items in the middle two panels and the more rare items on the outer edges. This is simply for ease of finding things visually. If you decide to drop the same information on the players’ side of the screen, I recommend putting the identical pages directly opposite the pages you have on your side, so that it’s kind of a mirror image. This way, if a player is having issues finding something on the screen and you know where it’s at, you can point out the appropriate panel for the player. This will help speed up the game, which is the whole point of the GM screen in the first place.
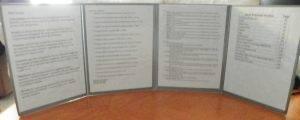
Here is a (slightly blurry) photo of a GM screen I made for TechNoir:
I hope my information here has helped you out with your GMing efforts. There are plenty of great GM screens out there on the market. I’m wondering which ones (from the past or present) have really helped you out with your gaming needs.








I like it. Good advice on using the act of making a GM screen as a rules-learning exercise. I have both the Hammerdog screen and also the Pinnacle Savage Worlds Customizable GM Screen. It’s only 3 panels but for a horizontal screen it gets the job done.
The only thing I would do different (and this is me – YMMV) is, instead of using a spreadsheet for “minor layout skills”, I open up Quark or Page Plus and lay out the info there. Then again I also have some experience with layout.
Also, while I don’t know if this is going to help you with the rules (or break the “no scanning/copy/pasting, etc.” is that I usually have a PDF of the rules. So I highlight and paste into my layout document and arrange to taste.
The Pinnacle screens are also nice. I have one of those for my Savage Worlds print-and-play screens for the various settings/genres. It’s pretty slick. I’m not a big fan of landscape GM screens because if you’re using them to hide your notes (my purpose for a screen), it doesn’t do a great job. However, I must say that it’s MUCH easier to slide a sheet of paper into the landscape screen than the ones that are oriented in “portrait mode.”
I agree that dropping into something like Quark or inDesign would produce a better screen without the need of printing smaller grids, cutting them out, taping them to a larger sheet, and then photocopying the whole affair. However, that’s also an investment in a large sum of money and time to properly learn those tools. There are some freebies out there that I’ve tried, but I always run screaming back to my comfort zone… which is inDesign.
I’m going to have to say that doing a copy/paste out of a PDF breaks the rules. 🙂 However, if it works for you, then go for it!